
Your cart
There are no more items in your cart
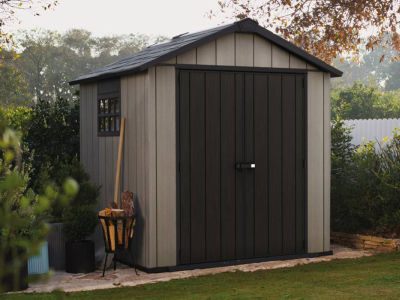
Garden shed - Assembly
Garden shed – Tools
Assembling a garden shed requires having the necessary tools for this type of project. You will therefore need the following equipment:
- For a garden shed, you must first obtain (either by purchase or hire) the necessary equipment. This equipment mainly consists of a saw, a hammer, a tape measure, a spirit level, a spade, a garden spade, a drill, a screwdriver, a chalk line and a stepladder.
- Make sure you have safety goggles, protective gloves and a hard hat.
- When handling heavy materials (bags of cement, planks and thick panels, etc.).
Assembling a garden shed is not complicated for a keen DIYer. However, do not hesitate to ask a friend, a family member or a professional fitter for help if you are not used to major DIY projects. Indeed, careful assembly, carried out in accordance with best practice and the instructions in the installation manual, is the best guarantee of the longevity of this type of structure.
Garden shed – Construction
Foundations
When installing a garden shed, you can choose between three types of foundations: a concrete slab, concrete blocks or a wooden platform. The actual foundation work is divided into three stages:
- Mark out an area slightly larger than that of the garden shed (allow an extra 30 to 50 cm on all sides), ensuring that the four corners are at right angles by using a set square or measuring the diagonals. Dig out the marked-out area to a depth of 10 to 15 cm.
- Lay a layer of gravel, then fill the excavated area with a first layer of concrete, on top of which you can lay the pipes for future utilities (water, electricity, telephone, mains drainage, etc.). After laying a steel mesh to ensure the structure’s strength, fill the area with a second layer of concrete, ensuring it is slightly sloped to facilitate rainwater drainage (use a metal straightedge to level the concrete surface). The slab takes 2 to 3 weeks to dry.
- The third step can be carried out in two ways:
- Fixing the garden shed floor to the screed thus created. After inserting wall plugs into the holes already drilled in the timber, screw the floor in place.
- • Fixing the garden shed floor to joists (with or without nails) to improve thermal insulation.
In some constructions, the concrete screed can be replaced by a wooden platform: a frame of treated wooden battens rests on a water-repellent membrane designed to prevent rising damp. This serves as the base for the wooden floor. This type of foundation is superior to a concrete screed in terms of insulation and the ease with which the garden shed can be dismantled.
Assembling the frame and roof
The process of erecting the frame and roof of a garden shed can be divided into four stages:
- The wall frame is constructed using two full beams on the side walls and half-beams on the front and rear walls. The walls are then assembled using the tongue-and-groove system as shown in the instructions. This work begins with the base frame and ends with the fitting of the gables.
- At the top of the two side walls, two large triangular gables are fixed in place, to which the metal roof truss and its purlins are attached.
- The roof boards are nailed to the purlins, working from the ends towards the ridge. If you opt for a tiled roof, the tiles are interlocked and secured to the purlins (using tile clips, etc.) in the same way as the boards.
- Bituminous roofing sheets (instead of shingles) are fixed to the roof using special wide-headed nails or high-temperature adhesive strips.
Garden shed – Finishing touches
Fitting the openings (door and one or more windows) follows four rules:
- The frames are fitted after the fixing points have been sawn out.
- Doors and windows must be screwed directly onto the frames.
- It is strongly recommended that doors and windows open outwards.
- The glazing and fitting of locks with padlocks should be carried out next.
To protect the sides of a garden shed from water running off the roof and to collect rainwater, it is advisable to install guttering, particularly for tiled roofs. The water collected in this way can be stored in a small tank placed nearby. To help the shed blend in better with your garden, you can cover the surrounding area with treated wooden planks. The assembly and finishing of garden sheds supplied as flat-pack kits are considerably quicker (steel sheds are supplied with an anchoring kit).
As with all building work, the care taken and the quality of the finish are crucial to ensuring a garden shed is sturdy and has a long service life. Although a garden shed can be assembled by a layperson, only the assistance of an experienced person will guarantee the structure’s longevity. Indeed, as this is an investment, small savings made on installation can prove costly in the long run.
An assembly and installation guide is, of course, included with a flat-pack garden shed. HABITAT ET JARDIN makes its teams available to provide you with all the information you may need for the installation or assembly of your garden shed.
Copyright protected under Articles L. 111-1 and L. 123-1 of the Intellectual Property Code.